Long Winter Days

Standard

While our days are long and a tad dreary in our New England winter weather, and if you’re not an outdoorsy person, these days afford us time to be creative. What could be more fun than that?

After fighting off a three week bout with bronchitis, I’m back to work on a new Zentangle book, and I’ve been creating mandalas. They’re so delightful to make. All it takes is a little ingenuity, a few tools, and there you are!!

This was done using a circle made with a protractor, a sketch pad, a pencil, and a pen. The circumference is 7.5″. Once I finished tangling the second mandala, I added color.

img_14651

img_14621

These two projects took quite some time. First, because they are large, and secondly, due to color choices and placement. I have yet to shade each of them with graphite.

Over the weekend, I played with small squares for tangled mandalas. While they aren’t quite finished, I’m happy with the progress I’ve made. The top mandala has, so far, been done in color and black and white. The other two below it, are black ink only. Should they end up in color, I’ll post the finished product on my Facebook page:                                              https://www.facebook.com/jeanne.paglio

img_14681

How many of you have tried your hand at Mandalas, or have perfected them? I’d enjoy knowing, feel free to send them to me at JMPag9@aol.com so I can see what you’ve accomplished.

I know I haven’t been in touch for a while, and I apologize for that. WordPress was giving me problems, as was Google. All is straightened out, finally! Best wishes for an interesting 2017 and I hope to hear from you!


A Tiny Art Project

Standard

Hey there everyone – Today I have a tiny art project with instructions to share with you. So get your supplies out and get ready to create!!

IMG_1243

Supplies needed:

3 1/2″ x 2 1/2″ black heavy duty card stock

2″ x 3″white heavy duty card stock

black .005 micron pen

watercolor pencils ( your choice or I used yellow, dark yellow, blue and Prussian blue, pink and dark pink, light blue, green)

Self stick clear crystals

# 2 or #3 watercolor brush

#2 pencil

Tacky Glue

Instructions:

Begin by drawing or transferring the flower petals and outline onto the white card stock surface with the pattern below using a pencil.

IMG_1373

Once the lines are all in, apply yellow to the petals of center flower and add a touch of dark yellow at the pointed end of the petals; apply blue to the petals of the flower on the left and Prussian blue to the pointed sections. Apply pink to the petals of the flower on the right and add dark pink to the pointed areas of the petals.

Moisten the paint brush with water, blot the excess water onto a paper towel and begin pulling the pink color down into the dark pink color of each of those petals. Too much water in the brush makes puddles so be sure to blot the brush if there’s too much water in it. The pointed ends of each petal should be darker than the rest of the petals. Move on to the yellow flower, rinse the brush so it’s clean, then blot any excess water from it. Start at the wide end of the yellow petals and pull the color toward the point. Do the same technique for the blue flower petals making sure to begin with a clean, moist, blotted brush.

While the petals dry, move on to the stems and leaves. Apply green to the stems and leaves and moisten the color with a clean, wet brush. Again, make sure to blot the brush before applying it to the color. Let this dry. (It doesn’t take long).

Once the petals are dry, use the Micron pen to draw an outline around each flower leaving a white space between the color and the ink line. (see the pattern). Gently add light blue for the sky and wet it with the brush to create a blue sky (refer to the colored picture above), making sure to avoid getting blue on the white area surrounding the flower petals. Apply green about 1/2″ from the bottom of the drawing moving in an upward direction. Wet this with a clean, moist brush to create grass. Let the entire painting dry. Add the details shown below using the Micron pen.

IMG_1374

Spray with varnish to add a fine shine to the painting. Let the varnish dry thoroughly before gluing the painting onto the black background. After the surface is dry, turn it over and apply tacky glue to the inner edges of the white paper. Hold the paper carefully by the corners when turning it over, center the painting on the black background and press firmly in place. Should the black paper need trimming, wait until the glue has dried before doing so to avoid the possibility of the white paper moving. Place the crystals in the center of each flower.

There you have it, your very own Tiny Art treasure! ENJOY!!


Tiny Art – Big Ideas Articles Celebration

Standard

Most of the time, I write novels, but there are those days, months, and moments, when I simply must be creative in my art studio. We all know that feeling, don’t we? That second when a creative idea flashes through your mind and you know you have to take advantage of the thought or lose it altogether?

Not so long ago, I pitched an article to Laura Haughey, the publisher of the online magazine PaintingEzine.com and the upcoming Painting World Magazine that will be in paper form. Laura got back to me right away. I was pleasantly surprised when Laura not only approved my Tiny Art technique piece/article, but when she read why I’ve taken that direction with my art work, she requested an article on downsizing to a mini studio. I’m so thrilled to be working with her on these projects, and I’ve begun to assemble them as I write this!

Another magazine that I pitched my work to, is the Interactive Artist Magazine found at  http://www.InteractiveArtistMagazine.org

That article will be out by the end of this month. Here’s a photo of the project:

IMG_1025

I hope you’ll do the project, it’s not difficult, and is lots of fun!

The next step in my plans for Tiny Art – Big Ideas, is to approach a DIY program with this idea, to also approach the Tiny Homes project manager that currently has a television program, and also pitch the idea to a book publisher. I know, those are big ideas, and a bit daunting, but I’ve always believed in taking chances. If they work out, OK, and if they don’t, it’s back to the drawing board for me. I feel this is the direction I’m supposed to go in and friends who have worked in television and publishing have encouraged me to take these steps. I thank them for that encouragement!!

And, by the way, in celebration of the magazine article accomplishments, I’m giving away five of my Zentangle books FREE, so if you’re interested in having one, please email me directly at JMPag9@aol.com. The names of the 5 winners will be chosen this coming Friday, May 27th at 12 noon. It’s my May Book Giveaway (instead of a May Basket, :D) and these are the offerings:

365 front cover   Heartstrings  Zentangle No Boundaries  TICcover  ZIR2FrontCover

I look forward to hearing from you!

Jeanne

The Cost of Being Creative Part 3

Standard

Thinking over what I’ve already covered, and considering other avenues available, I realize I can’t possibly cover everything, but hope I’ve given you food for thought.

Another way to create a platform and brand for your creative products is to submit article ideas to magazines, both online and in paper format. I’ve been published in a variety magazines for many years and while you won’t get rich, you will make money. The most important part of this will be creating an identifiable brand for you and your name. I continually work to come up with ideas that are different than what’s offered to the public these days. I also consider whether those ideas will hold appeal for an art director/editor/publisher’s interest to be piqued enough to offer me an opportunity to be published in their magazine. By following submission guidelines offered by the magazine, I send project photos and information off  by email or postal mail. Whichever way that is accepted. These days, email is more often used than postal mail. After that is done, I move on to the next project while I wait to hear from the publisher.

Waiting! The wait can seem long and drawn out, but think about this: I’m not the only artist to submit and the line can be long. I’ve waited over three months in some cases, given up in others after not hearing for six months. Let me say that not having heard from the publisher by the six month period, like as not, my project has been rejected. Often times these people are overwhelmed with work and don’t bother letting you know that you weren’t accepted. Rude? Very. Can you do anything about it? Unlikely, so move on and submit the project to another company. I often feel like the powers that be don’t consider our work matters and would like to have a yes or no. I used to be upset over getting a “no thanks”, but figured it was at least an answer, right? I’m not easily discouraged like I was in the beginning of these ventures. I’m more tenacious and less inclined to feel defeated. Since I do have a brand, it’s easier for me to get published. (Though the answer from publishers isn’t always “YES”)

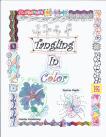
A book deal is another way to get your name out there, but know this, it’s more work than you can imagine, a fantastic experience, and poorly paid unless you sell a ton of books. The upside of a book deal is the experience you get from having done a book with a publisher and the fact that these companies have a long reach, more so than just putting your book out on Amazon. The other plus is that it assists you in developing your brand.Publishers have a budget they use to promote their authors/artisans, they can put your physical books into places like Barnes & Noble, Michael’s Craft Store, Hobby Lobby, etc. It’s nearly impossible to achieve that on your own, because shelf space in these places is difficult to acquire.

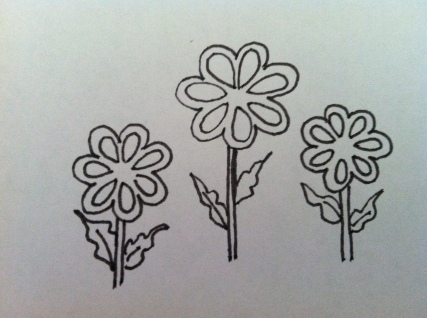
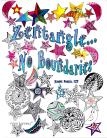
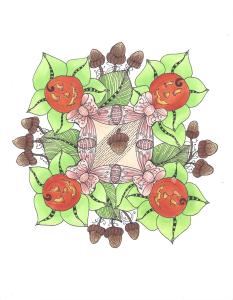
Brands: When I think of a brand, Lynne Andrews work pops into my head. Her brand is easy to identify, well-known around the world, and has a warm fuzzy feeling to it. Her artwork is one of my favorites, and yes, I enjoy painting with her when times permits. Once you’ve seen her work, you’d know it anywhere. That’s a brand. Carol Spohn is another artist that I’ve added to my faves list. Her work has a unique, different look and feel to it, and is identifiable. That’s her brand. When you see her work, you know who the artist is. It’s important to have a brand, a type of work you are identified by and with.

I’ve hit on a few of the possibilities in the branding of your work, publishing in magazines and books, and hope that I’ve given you a place to start looking for another avenue to get your specialty out to the public and make a living from it at the same time. If you are interested in more information or have questions, email me at JMPag9@aol.com

This is the final article in this series, but don’t let it be the end of places you can find that will work for you by simply searching the web. There is much more to being creative and earning a living from it than I could ever cover, so take heart, just keep going, step outside your comfort zone, especially if what you’re presently doing hasn’t resulted in achieving your goals.

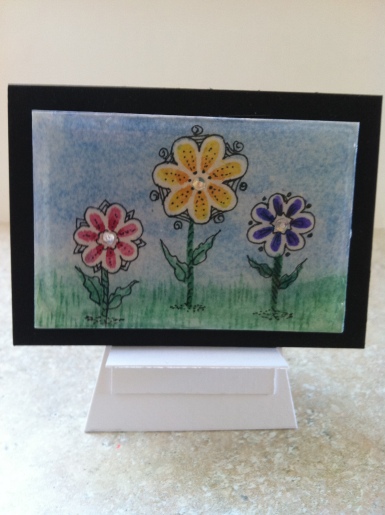
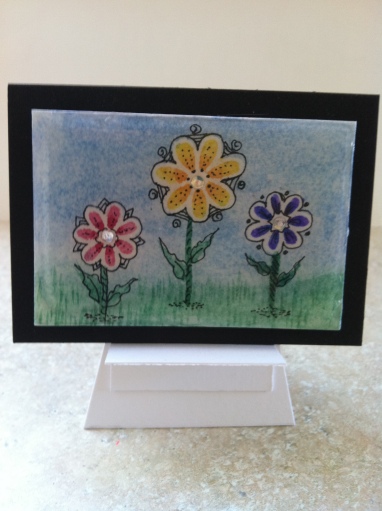
P.S. I pitched my “Tiny Art – Big Ideas” to an editor friend of mine in order to pick her brain for a direction to take. Some of her thoughts were: Tape YouTube videos; make kits for the projects and sell them on my blog or website; submit my work to a book and magazine publishers; create a pitch for a TV series; that’s just to mention a few of her wondrous ideas.

Good luck!

IMG_1243

The Cost of Being Creative – Part 2

Standard
The Cost of Being Creative – Part 2

So, I tried to get to this second part of the series on being creative and getting paid for it, but time flew, away and I find I’m a week late. Shame, shame, I know! I’m here now so let’s get going on the way to find markets for your creativity, if that’s what you seek.

There are many options to consider and things that must be figured out when searching for the right venue for your particular artwork/craft. I covered the craft show in part one, so let’s take a look at where else you can display and sell your work. There aren’t that many shops in my area that will take handcrafted items on consignment, but those that do usually pay 60/40 or 70/30. This means the artist receives 60% or 70% of the sale price and the shop is earning the remainder. Remember, you are giving up money to show and display your work, so price it accordingly. Don’t undersell yourself just because you’ve researched what others are getting for work similar to yours, be competitive and consider what you and your work is worth. I’m not being mean or bossy, I simply want you to make enough money to cover your costs, time, and make a profit in the end.

There are online shops that don’t charge much for displaying your work, and they have good reputations. http://www.artfire.com; http://www.etsy.com; and even http://www.ebay.com are a few. These places charge a percentage of sales or they charge a fee for having a shop. Make sure to read the FAQs before jumping in with both feet.

If you have a website, post your work there as well, add PayPal checkout to it, and then post those designs to Pinterest with the link to your website or online shop. Load photos onto Facebook and add your links to the post, then do the same with Twitter. There are a number of great ways to promote your work and generate sales. Be thorough, take good photos, and always follow-up with customers right away. Don’t leave them hanging for days, it’s bad business and shouts “unprofessional”.

I have a Storenvy shop, but haven’t done much with it yet. When I get it up and running, I’ll be sure to let you know how it’s going. No matter what, there is no free cost of doing business. There’s always money to be made, your brand to consider, and expenses that can be written off on your taxes at the end of the year. I consider my costs and travel as good write-offs.

This is it for this time. Next time round, I’ll talk about other avenues of getting your work out to the public. Good luck in your pursuits, and if I can help you in any way, please don’t hesitate to contact me. Happy Easter!!

The Cost of Being Creative – Part 1

Standard

IMG_1126

Having done craft shows for many years, I’ve found success in some and not-so-much success in others. I consider it part of the cost of being creative. First off, artisans never know what will strike a chord with consumers. It’s a serious guessing game, trending crafts tend to flood the market very quickly, and while we like to think our work is just that much more unique than the next artist’s on the block, it’s always a crap shoot.

As if I don’t have enough on my plate with writing, designing, and all that entails, I’m registered to do ten craft shows this year, beginning in June. This offers time enough for me to create merchandise that will “WOW” the public, so much so, that consumers will buy every piece of work in my booth. I know, you’re grinning, right? One can only hope that will be the case and work toward that goal by offering something different and being a good salesperson who can make the goal a reality.

In between time, I have plans to sell on Pinterest and might even get an Etsy shop going. I have a Storenvy shop that I haven’t completed setting up yet, and have heard some negative grumbling about that particular enterprise. Not sure how true the grumbling is, I won’t mention what I’ve heard.

Back to craft shows. . . If you do craft shows and fairs, then you know what I mean when I say selection of venue is paramount. I’ve done juried shows that appeared to be a great venue, yet once I got there, the show looked like a flea market which meant every consumer thought they could offer a mere fraction of the asking price.When reminded of the amount of work that went into the piece, the consumer didn’t consider it important. It’s the cost of being creative. But really? I refuse to reduce my price to make a sale, though there are lots of things I do offer to engage the customer. This new venue I’ve decided to participate with is a great spot, has talented vendors, and I look forward to being there to sell my work once or twice per month from June through December. Let’s hope I meet with success, for it won’t be due to lack of trying!

Let me know if you do shows and what makes them successful for you. I’d love to hear about that. Next week I’ll talk about the second part of The Cost of Being Creative, so join me won’t you?

Zentangle Helps

Standard

Yesterday, I had the opportunity to speak with a young woman who recently entered the Zentangle world. She had been in search of something to calm her mind, help her focus, yet be creative. Her aunt mentioned my books and handed one to her to spark her interest. Not sure this would be her cup of tea, the young woman opened the book and was immediately taken with the idea of tangling. Her work is stunning, and I wish I had a picture to share with you. She’s been tangling for such a brief span of time, but this art form has taken hold, left her calmer, more focused, and has eased her mind. What more could I ask for?

Not often do I have a chance to personally chat with people who have taken up Zentangle, to hear the reasons they’ve done so, or to hear the benefits they have gotten from it. I came away from our brief encounter with the knowledge that what I do, and what Rick Roberts & Maria Thomas have done, has impacted the life of someone who sought an art form that would lighten their load. I was so inspired by this woman’s story, that I came home, pulled out my own tangling supplies and got busy.

While I’m unable to share her work, I can show you how tangling works for me. I also hope it works for you. Until next time, tangle away, it’s good for the soul!

three


February Blues

Standard

We all wonder when spring will arrive and look forward to the changes coming up sooner than we think, or hopefully so. Since we can’t do anything about the weather, we could look at winter in a different way. While cooped up inside, we can be creative. Let’s take the time to try our hand at things we’ve always wanted to do, but never quite got to.

I’ve begun to draw and color gems on inchie and twinchie squares. What’s an inchie square? It’s a 1″ square of pre-cut mat-board. These little darlings come in a variety of sizes that appeal to those who might find an entire sheet of paper/canvas daunting. I don’t have that particular issue, but I do like to work small on occasion. Here’s the link to view inchie products: http://www.inchiearts.com I’m sure you’ll find the sizes intriguing.

What prompted my interest? I happened to see Eni Oken’s art work online and thought inchie products would fit the bill, for my purposes, that is.
Here are some images of the mini-canvases (not really canvas, but I call them that) I’ve created lately. I’ve also begun to assemble a PDF for those who would like to learn the how-to of it,and using various media to do so. Once I get started, time flies, my enthusiasm grows, and I can’t do enough gem squares. As you can see, I like a textured look, using different products, and adding a tangled trim to each design and backdrop. I finish them up with a smooth, shiny gloss that makes the stones pop. I’m still perfecting my handmade easels. Most of the squares end up at 4″x 4″ inches and sit on a small easel to show them off nicely.

What are you working on???

Fall for All

Standard

My favorite time of year is here at last. The smell of crisp leaves, chilly breezes, and the delightful colors of foliage excite me every year. Some like summer best, others enjoy winter or spring, but I am a firm lover of fall. Why? I’m inspired by the colors Mother Nature offers during this brief period of time, and the urge to paint, color, and draw come sharply into focus.

Whether you live in New England, as I do, or in other parts of the USA or the world, I’m sure fall brings a form of inspiration to you as the season changes.

Enjoy my colored Zentangle design from the Fall for All book. You can find it on Amazon here: http://amzn.to/1udIRSj

Fall Delights

Join me again tomorrow for another Fall for All page and more news!